Showing posts with label sensor. Show all posts

Sunday, April 30, 2017

Building a Custom Strain Gauge with Electric Paint

In this video we look at how we can use Bare Conductive's Electric Paint to create a custom strain gauge.


/*
 * This code was written for a video on the ForceTronics YouTube channel. This code is public domain and can be used and modified by anybody at your own risk
 */

#include <Average.h> //Call average library

void setup() {
  Serial.begin(57600);
  analogReadResolution(12); //Set Arduino Zero ADC to 12 bits
  for(int i=0;i<4;i++) analogRead(A0); //burn a couple readings since we changed ADC setting
  Average<int> ave(10);
}

void loop() {
  delay(100);
  Average<int> ave(10); //Create average object
  for (int i=0; i<10;i++) ave.push(analogRead(A0) - 2700); //get 10 readings and subtract most of the value off to look at small changes
  Serial.println(ave.mean()); //average the 10 readings together
}

Wednesday, March 22, 2017

Reduce Noise in Your Sensor Measurements with an Active Low Pass Filter Part 3

In this three part series we look at how to design a signal conditioning circuit to increase the accuracy and resolution of your ADC sensor measurements. The signal conditioning circuit consists of a double pole active Sallen Key Low Pass Filter and a non-inverting op amp. The filter portion is meant to attenuate high frequency noise from your sensor signal to increase measurement accuracy. The amplifier portion scales the signal up to the full range of the ADC to ensure you are getting max resolution. In part 3 we test our finished LPF + Amp circuit. 


If you are interested in purchasing the circuit from the video go to forcetronics.com

You can access the Eagle files on Github at: https://github.com/ForceTronics/Salle...


Sunday, March 5, 2017

Reduce Noise in Your Sensor Measurements with an Active Low Pass Filter Part 2

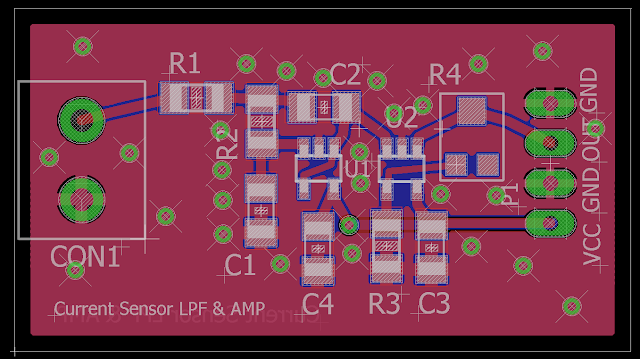
In this three part series we look at how to design a signal conditioning circuit to increase the accuracy and resolution of your ADC measurements. The signal conditioning circuit consists of a double pole active Sallen Key Low Pass Filter and a non-inverting op amp. The filter portion is meant to attenuate high frequency noise from your sensor signal to increase measurement accuracy. The amplifier portion scales the signal up to the full range of the ADC to ensure you are getting max resolution. In part 2 we do the PCB layout of our circuit using Eagle CAD software.


You can access the Eagle files on Github at: https://github.com/ForceTronics/Sallen-Key-Low-Pass-Filter-Design/tree/master


Monday, February 27, 2017

Reduce Noise in Your Sensor Measurements with an Active Low Pass Filter Part 1

In this three part series we look at how to design a signal conditioning circuit to increase the accuracy and resolution of your ADC measurements. The signal conditioning circuit consists of a double pole active Sallen Key Low Pass Filter and a non-inverting op amp. The filter portion is meant to attenuate high frequency noise from your sensor signal to increase measurement accuracy. The amplifier portion scales the signal up to the full range of the ADC to ensure you are getting max resolution.


You can find the online filter calculator used in part one at this link: http://sim.okawa-denshi.jp/en/OPseikiLowkeisan.htmk

You can access the LTspice file on Github at: https://github.com/ForceTronics/Sallen-Key-Low-Pass-Filter-Design/tree/master

Sallen-Key Low Pass Filter Circuit with Amplifier Stage in LTspice

Thursday, November 3, 2016

Creating a Sensor Network that Connects to the Cloud Part 2

In this three part series we look at how to create a wireless sensor mesh network that stores data on the cloud using the Arduino platform. In part two we look at how to add time stamps to our sensor data and track the battery state of our nodes.


GitHub: https://github.com/ForceTronics/nRF24L01-Sensor-Network-that-Connects-to-the-Cloud/tree/master

Monday, June 20, 2016

Building a Wireless Sensor Network with the nRF24L01 Part 6


In part 6 we look at the final hardware design, we switch to the TMRh20 library for the nRF24L01, and we look at a library wrapper that makes getting started with your own wireless sensor network real easy. Go to ForceTronics.com to purchase a wireless flex node and go to Github to access the code and PCB design files.